Installing vRealize Network Insight with PowerCLI
The good people of vRealize Network Insight made the OVAs of Network Insight 3.2 Import-vApp safe, which means you can now install it with PowerCLI!
Network Insight consists of two VMs; the Platform VM and the Proxy VM. The setup process looks like this:
- Deploy Network Insight Platform OVA to vSphere
- Browse to the Platform UI and:
- Active your license,
- Generate a Shared Secret for use in the Proxy VM deployment.
- Deploy Network Insight Proxy OVA to vSphere
- Login to the Platform UI and start adding data sources and consume all the goodness that is Network Insight!
Having to deploy Network Insight many, many times at work and (probably mostly) in my homelab, I wanted a way to automate the process. After a bit of tinkering and reverse engineering, I found a way. The issue is that Network Insight does not have a public API which can be used for deployment. Instead, I had to resort to private APIs (which Network Insight already has a bunch of!). While unsupport, it works! More on those private APIs later.
Also, if you want to skip ahead, this all is in a script on my GitHub repository. ;-)
Platform VM Configuration
To deploy a OVA with the Import-vApp cmdlet, you first need to create configuration object in which you configure the network settings and some other options which are specific to Network Insight. This is how that should look (using your own specifics, of course):
# Get the configuration of the downloaded OVA first
$OVA = "D:\OVAs\VMWare-vRealize-Networking-insight-3.2.0.1480511973-platform.ova"
$OvfConfiguration = Get-OvfConfiguration -Ovf $OVA

# Then adjust the options needed to deploy
$OvfConfiguration.Common.IP_Address.value = "10.0.0.31"
$OvfConfiguration.Common.Netmask.value = "255.255.255.0"
$OvfConfiguration.Common.Default_Gateway.value = "10.0.0.1"
$OvfConfiguration.Common.DNS.value = "10.0.0.66"
$OvfConfiguration.Common.Domain_Search.value = "lab.lostdomain.local"
$OvfConfiguration.Common.NTP.value = "10.0.0.66"
$OvfConfiguration.Common.Web_Proxy_IP.value = "10.0.0.66"
$OvfConfiguration.Common.Web_Proxy_Port.value = "8080"
$OvfConfiguration.Common.Rsyslog_IP.value = "10.0.0.60"
$OvfConfiguration.NetworkMapping.Vlan256_corp_2.value = (Get-VirtualPortGroup -Name "Management_VMs")
$OvfConfiguration.Common.Log_Push.value = $False
$OvfConfiguration.Common.Health_Telemetry_Push.value = $False
A few comments about the options I’m using above:
- Only set the Web_Proxy options when Network Insight is going to need a proxy to connect to the internet. There are a few SaaS services it uses to do it’s job, i.e. an update checker.
- Same goes for the Rsyslog_IP option; Network Insight will send appliance logs towards that syslog server. If you don’t have a syslog server, the logs will remain on the Network Insight appliance.
- The “Vlan256_corp_2” option came from the OVA and presumable it is the portgroup to which the deployment process over at VMware is using. This might change in the future, so if you are doing a deployment of a newer version than 3.2 and it fails, probably look at that first. In case you were wondering, “Management_VMs” is my portgroup on which these VMs are connected to.
- Log_Push and Health_Telemetry are options where the appliance will send (anonymous) performance data to VMware and help them get an understanding on how the product is being used (sizing, performance, etc). My setup doesn’t have internet access, which is why I disabled it - but if you’d like for Network Insight to get better and more scalable, you’ll be doing VMware a solid by enabling these options.
Deploy the Platform VM
Alright, after configuring the $OvfConfiguration object, you can use it and deploy the appliance with Import-vApp:
$VM = Import-vApp -Source $OVA -OvfConfiguration $OvfConfiguration -Name "NetworkInsight-3.2-Platform" -VMHost "esxi01" -Datastore "vsanDatastore" -DiskStorageFormat Thin
$VM | Start-VM
The last line automatically starts the VM as well. Be mindful of the destination ESXi host (you can also use -Location and target a cluster) and datastore. I’m also using thin provisioning on the datastore, but in production you’d want to use thick.
Activating the License & Generating the Proxy Shared Secret
Once the OVA deployment has completed, we can activate the license key and generate a shared secret for the next step; deploying the Proxy VM.
Login to the Platform VM
To programmatically login to the Platform VM, we can execute a POST call to https://<Platform_VM_IP>/api/auth/login with 2 POST variables: username and password. Those variables can be valued on the default Network Insight login: admin@local / admin
That will generate a session cookie that contains the authentication ticket, save that cookie.
Activating the License
To activate the license on the Platform VM, there’s a straightforward POST call to https://<Platform_VM_IP>/api/management/licensing/activate with 1 POST variable: licenseKey. You can value it with your license key.
Generating the Shared Secret
Finally, we need to generate the shared secret. We need this for the Proxy VM deployment and contains information about the Platform VM. To generate it, we can do a POST call to https://<Platform_VM_IP>/api/management/nodes, with no variables. This will generate a JSON response where the data variable contains the shared secret. Store that and move on to the Proxy VM!
Proxy VM
Deploying the Proxy VM is basically a rinse-and-repeat exercise, with one exception: the shared secret. This shared secret is generated in the previous step and contains encrypted information about the Platform VM (such as it’s IP address, so the Proxy knows where to connect).
Begin with adjusting the $OVA path to the Proxy VM, execute the Get-OvfConfiguration and set all previous options. Here’s the shared secret configuration:
$OvfConfiguration.Common.Proxy_Shared_Secret.value = "copy-and-paste-this-string-from-the-platform-ui"
To start the deployment, use Import-vApp again. After the Proxy VM successfully deploys, the Platform UI will automatically detect its presence and you’ll be in business.
Get the Script
While it’s not with using public APIs (so probably prone to breaking), you can fully automate the vRealize Network Insight installation. The manual installation isn’t that time consuming..but when you’re doing things more than once, automate!
All the information above is compiled into a single script, available on my GitHub repository.
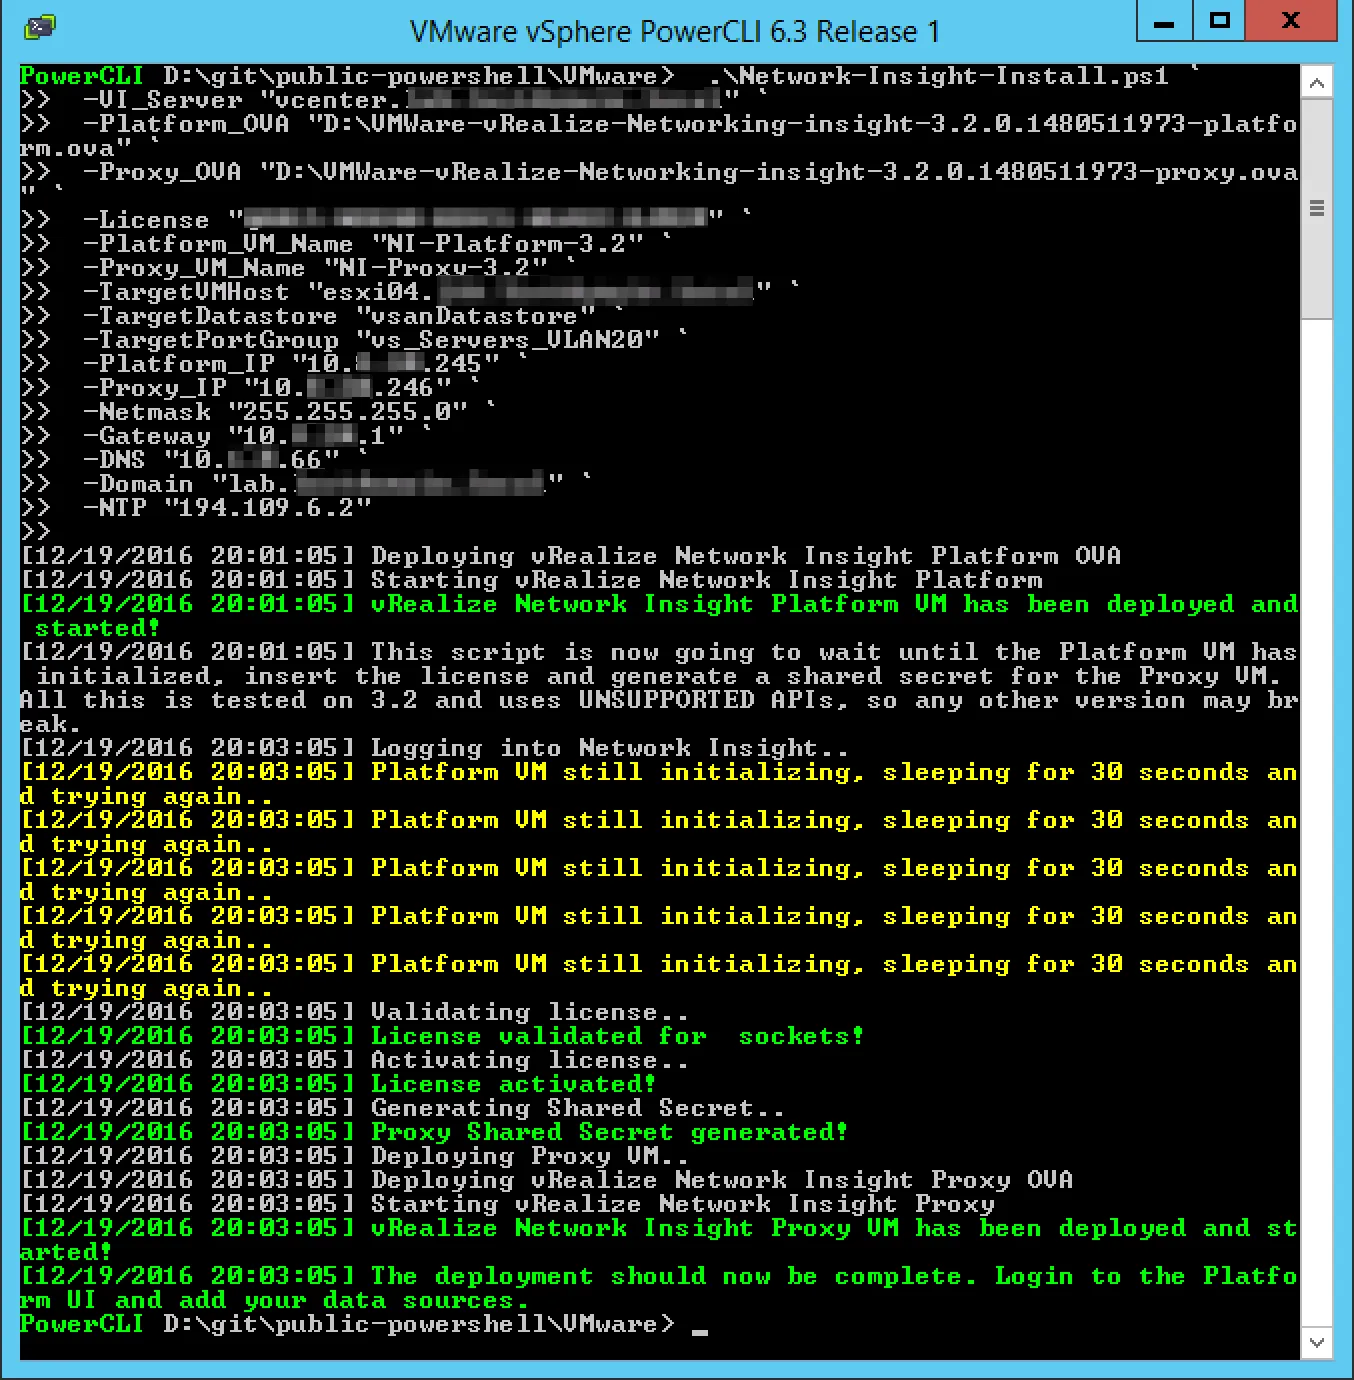
Here’s an example on how to use it: