
Let’s say you have an existing website or web application where you’d like to add a blog or documentation site like VuePress or Docusaurus. While keeping it separate from the existing site’s codebase, but still using the same domain name.
When it comes to search engine optimization (SEO), there’s evidence that sub domains don’t benefit from the backlinks your main domain has, thus ranking sub domains lower.
Background
In this case, I have a typing test app called TypeTest.io and I wanted to add a blog to optimize for SEO. I did not want to add it to the NuxtJS app that runs the main app, but instead, use VuePress - which is great for standalone blogs or documentation sites. I use it all over. 🙂
Keeping in mind to host the new VuePress app on https://typetest.io/blog/ - I looked at my options. Luckily, I host everything via Cloudflare, which has an interesting feature where you can route specific URLs via a Cloudflare Worker:
 routing typetest.io/blog via a worker app.
How do we build this?
So, we have an option to route specific URLs via a worker, that’s awesome. How do I get the VuePress app behind that worker? It wasn’t straightforward, as Cloudflare Workers are designed to run a single action. Server-less functions, if you remember those. You can’t run an entire VuePress app behind it, is my point.
But what about running VuePress as a Cloudflare Pages app and do a simple reverse proxy inside the Cloudflare Worker? That would work! It’ll look like this:
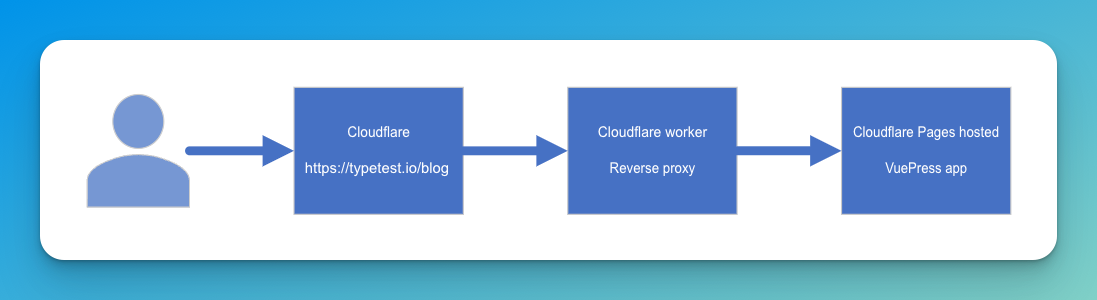
For workers, the first 100,000 daily requests are free. We like free things. Cloudflare Workers & Pages are also pretty fast, as they get deployed to Cloudflare’s global network and requests are handled closest to your visitors.
Step 1: Deploy your blog to Cloudflare Pages
I’m not going through the entire process of setting up a blog on Cloudflare, as they’ve got you covered. Here are a few step-by-step tutorials:
- Deploy a VuePress site: https://developers.cloudflare.com/pages/framework-guides/deploy-a-vuepress-site/
- Deploy a Docusaurus site: https://developers.cloudflare.com/pages/framework-guides/deploy-a-docusaurus-site/
Make sure to deploy it on a URL you can remember, like blog.yourdomain.com. The only thing you need to do different, is make sure the base URL is set to /blog/ mirroring the structure of your main domain. In VuePress that’s setting base: '/blog/', in config.js.
Step 2: Creating a Cloudflare Worker
To implement the main idea above, you need to create a Cloudflare Worker. Follow these steps to get started:
- Open the Cloudflare dashboard and navigate to the "Workers & Pages" tab.
- Click on the "Create application" button.
- Select "Create Worker."
- Add the code from the worker.js file from my GitHub repository here: https://github.com/smitmartijn/cloudflare-reverse-proxy-worker/blob/main/worker.js
- Be sure to update the OLD_URL and NEW_URL variables with your URLs.
- Click on the “Deploy” button when you’re done.
The code is relatively simple; it fetches the same incoming URL (/blog/my-post.html) from the actual VuePress app, transforms any absolute URLs, and shows the result.
Step 3: Creating a Worker Route
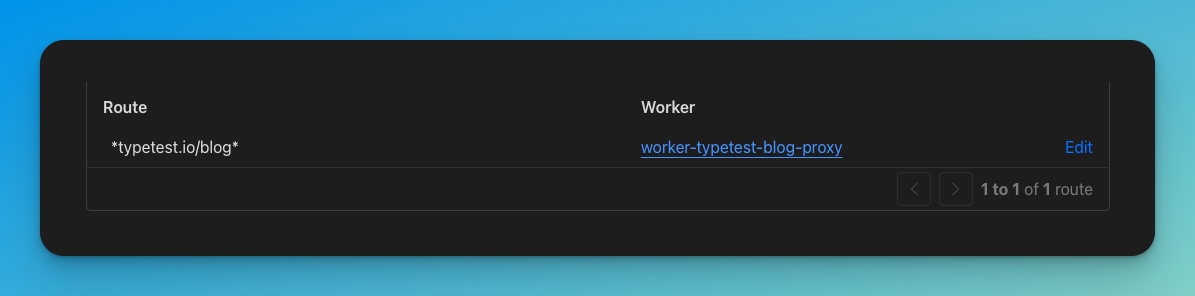
By now, you’ve got a working blog app on a subdomain, and a worker URL (name.something.workers.dev) that acts as a reverse proxy for the blog. We’ll create a Worker Route to make sure traffic to yourdomain.com/blog gets routed to the worker.
- Open the Cloudflare dashboard and navigate to the “yourdomain.com” site.
- Click on the “Worker Routes” menu item on the left navigation menu.
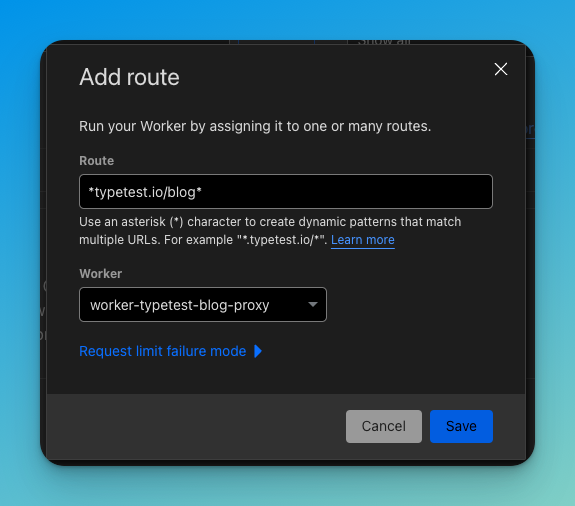
- Click the “Add route” button.
- In the popup, enter the route (*yourdomain.com/blog*) and select the worker.
- Click the “Save” button and browse to https://yourdomain.com/blog to see your blog 🎉
What about performance?
I hear you thinking, "we're putting an extra hop between the visitor and my blogs, won't that slow it down?!" - luckily, the answer is: not really. It's still speedy gonzales fast. The traffic gets routed to the closest Cloudflare node, it runs the worker there, then retrieves the blog from its closest node - which is likely in the same datacenter. In any case, I tested using Lighthouse:
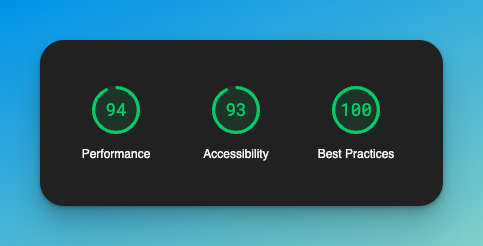
Not bad. 😊
Leave a Reply